
If you own a property that relies on rainfall or well water, managing irrigation can be a major challenge.
Traditional irrigation systems are not only expensive but also consume large amounts of energy.
However, with the right tools and knowledge, you can build your own affordable DIY irrigation pump using locally available materials and reduce your reliance on commercial solutions.
We will guide you through the process of constructing a low-cost yet effective irrigation pump that suits your off-grid property’s needs.
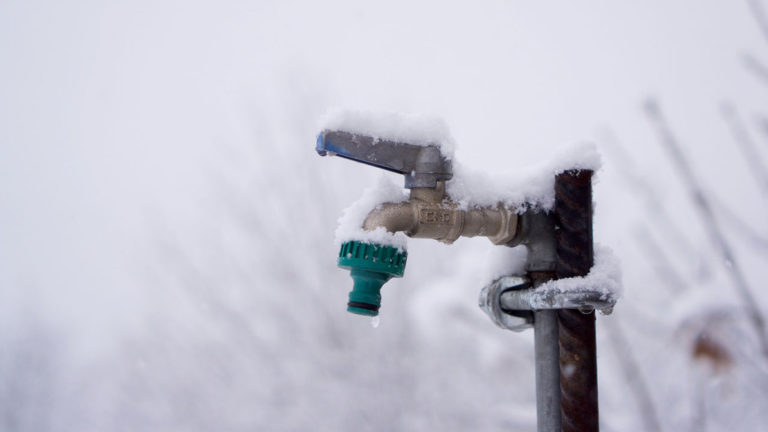
Choose the right location for your pump
Look for a spot that is close to your garden or crops, and has access to a water source. Make sure the location is level and has good drainage.
First and foremost, choose a spot that is close to your garden or crops, as this will reduce the length of pipes and hoses needed, saving you time and money.
Look for a location that has access to a water source, such as a well, stream, or rainwater collection system.
Next, ensure that the location is level, as an uneven surface can cause water to pool or flow unevenly, potentially damaging your plants or the pump itself.
Verify that the area has good drainage, as standing water can be detrimental to plant health and pump functionality.
By carefully considering these factors, you can position your pump for optimal performance, reduced maintenance, and a thriving garden.
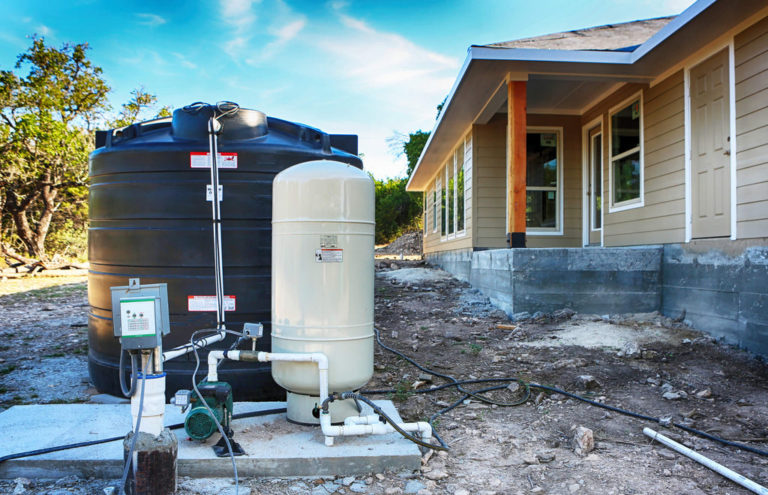
Select the appropriate pump
Consider the distance the water needs to travel, the height of the water source, and the pressure required to push the water through the system. A solar-powered pump is a great option for an off-grid property.
When selecting an appropriate pump for your off-grid property, it is essential to consider three key factors: the distance the water needs to travel, the height of the water source, and the pressure required to push the water through the system.
By understanding these factors, you can determine the most suitable pump for your specific needs.
For instance, if the water source is located far from the point of use, a pump with high discharge pressure and a long-distance capabilities may be necessary.
This can be achieved with a solar-powered pump, which uses renewable energy to push the water through the system, eliminating the need for electricity or fossil fuels.
If the water source is located at a high elevation, a pump with the ability to handle high pressure and lift may be required.
This can also be achieved with a solar-powered pump, which can handle pressures of up to 150 PSI, making it ideal for off-grid properties with high elevation water sources.
It’s important to consider the flow rate and efficiency of the pump, as well as the ease of maintenance and repair.
A solar-powered pump is a great option for an off-grid property, as it is easy to maintain and repair, and it is powered by renewable energy, making it an economical and environmentally friendly choice.
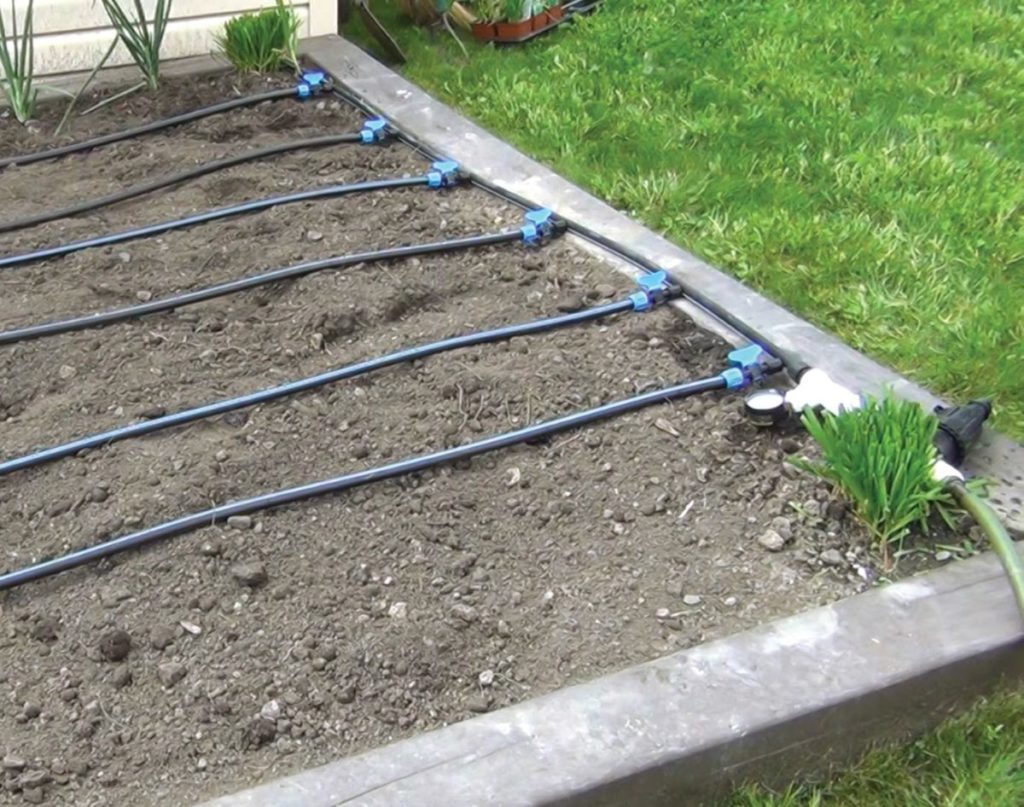
Use PVC pipe for the irrigation lines
PVC is an affordable and durable material that can withstand the pressure and stress of irrigating your property. It’s also easy to install and maintain.
Using PVC pipe for irrigation lines is a cost-effective and practical solution for homeowners and farmers alike.
PVC (polyvinyl chloride) is a versatile and durable material that can withstand the pressure and stress of irrigating your property, making it an ideal choice for irrigation systems.
PVC pipe is resistant to corrosion and can withstand harsh chemicals and extreme temperatures, ensuring a long lifespan and reducing the need for replacements.
PVC pipe is lightweight, easy to handle, and simple to install, making it a great option for those looking to DIY their irrigation system.
Moreover, PVC pipe is easy to maintain and repair, as it can be easily cut and joined with couplings and fittings.
Overall, PVC pipe is an excellent choice for irrigation lines, offering a reliable and efficient solution for water distribution.
Build a filtration system
Before the water reaches your plants, it’s a good idea to filter out any debris or contaminants. A simple DIY filtration system can be made using a 5-gallon bucket and some mesh material.
Building a filtration system is a important step in ensuring the health and longevity of your hydroponic plants.
Before the water reaches your plants, it’s essential to filter out any debris or contaminants that may be present in the water.
A simple DIY filtration system can be made using a 5-gallon bucket and some mesh material.
First, drill a few holes in the bottom of the bucket for drainage.
Next, cut a piece of mesh material to fit over the top of the bucket.
The mesh should be small enough to catch any debris or contaminants, but not so small that it clogs easily.
You can use a nylon mesh or a metal mesh, depending on your specific needs.
Once you have your mesh material in place, fill the bucket with water and let it sit for a few hours.
This will allow any debris or contaminants to settle to the bottom of the bucket.
After the water has sat for a while, you can pour it into a separate container, leaving any sediment or debris behind.
This process will help to ensure that your hydroponic plants receive clean, contaminant-free water.
You can add a small pump to the system to circulate the water through the mesh material.
This will help to remove any remaining debris and contaminants, resulting in even cleaner water for your plants.
By building a simple DIY filtration system, you can help to protect your hydroponic plants from harmful substances and ensure their optimal growth and health.
Create a switchbox
A switchbox is a device that regulates the pressure in your irrigation system and helps ensure that the water is distributed evenly. It can be made using an old electrical box and some basic electrical components.
Creating a switchbox is a simple and cost-effective way to regulate the pressure in your irrigation system and ensure that the water is distributed evenly.
By using an old electrical box and some basic electrical components, you can build a switchbox that automatically turns on and off to maintain the optimal water pressure.
This is especially useful for larger irrigation systems that cover a wide area, as it helps to prevent over-watering or under-watering.
To build a switchbox, you will need an electrical box, a pressure-sensing switch, a solenoid valve, and some wiring and fittings.
First, install the pressure-sensing switch inside the electrical box, making sure it is securely fastened and protected from the elements.
Then, connect the switch to the solenoid valve using the wiring and fittings.
Install the solenoid valve in the irrigation system, making sure it is positioned where the water flow can be controlled.
With these simple steps, you can create a switchbox that will automatically regulate the water pressure in your irrigation system, ensuring that your plants receive the right amount of water at all times.
Install a pressure gauge
A pressure gauge will help you monitor the pressure in your irrigation system and make sure it’s not too high or too low. This can be done using a simple pressure gauge and some PVC fittings.
Installing a pressure gauge in your irrigation system is an essential step to ensure proper functioning and optimal water delivery.
A pressure gauge will allow you to monitor the pressure in your system, helping you avoid both over-pressure and under-pressure conditions.
Over-pressure can cause pipes to burst, while under-pressure can result in inadequate water distribution and clogged lines.
To install a pressure gauge, you’ll need a simple pressure gauge and some PVC fittings.
First, locate a suitable point in your irrigation system where the pressure is consistent, such as near the pump or before the main distributor.
Then, attach the PVC fittings to the pressure gauge and secure them in place.
Once installed, you’ll be able to monitor the pressure in real-time and make adjustments as needed to ensure optimal performance.
By taking this simple step, you’ll be able to protect your system from damage and ensure proper water delivery to your crops.
Add an on/off valve
An on/off valve allows you to control the flow of water in your irrigation system. It can be made using a basic ball valve and some PVC fittings.
Adding an on/off valve to your irrigation system is a simple and cost-effective way to control the flow of water.
An on/off valve allows you to shut off the water supply to your irrigation system when it’s not in use, which can help save water and reduce your water bill.
To install an on/off valve, you’ll need a basic ball valve and some PVC fittings.
First, connect the ball valve to the water source and the irrigation system, using PVC fittings to join the two.
Then, attach a PVC Tee fitting to the ball valve, and run the stem of the valve to the desired location for the on/off switch.
Attach a PVC end cap to the stem of the valve to secure it in place and protect the valve from debris.
With an on/off valve, you can easily turn your irrigation system on and off as needed, without having to disrupt the rest of your yard or garden.
Plus, it’s a simple and affordable solution that can be installed in just a few minutes.
Test and adjust
Before you start irrigating your property, test your system to make sure it’s working properly. Make any necessary adjustments to the pump, pressure gauge, and filtration system to ensure that your irrigation system is working effectively.
Before you start irrigating your property, it’s important to test your system to ensure it’s working properly.
Begin by checking the pump to ensure it’s functioning effectively and delivering the appropriate amount of water pressure.
Next, inspect the pressure gauge to ensure it’s accurately measuring the pressure in your irrigation lines.
Check the filtration system to ensure it’s free from debris and functioning properly.
If any adjustments are necessary, make them now to avoid any issues later on.
For example, if the pump isn’t delivering enough pressure, you may need to adjust the pump speed or check for any blockages in the irrigation lines.
By thoroughly testing and adjusting your irrigation system before use, you can ensure that it’s functioning at its best and providing your plants with the right amount of water.
Before you start irrigating your property, test your system to make sure it’s working properly.
Check the pump, pressure gauge, and filtration system to ensure they’re functioning effectively.
Make any necessary adjustments to the pump, pressure gauge, and filtration system to ensure your irrigation system is working effectively.
By thoroughly testing and adjusting your irrigation system before use, you can ensure that it’s functioning at its best and providing your plants with the right amount of water.
Want More? Dive Deeper Here!
Hey there! If you’re the type who loves going down the rabbit hole of information (like we do), you’re in the right spot. We’ve pulled together some cool reads and resources that dive a bit deeper into the stuff we chat about on our site. Whether you’re just killing time or super into the topic, these picks might just be what you’re looking for. Happy reading!
- (PDF) Small Acreage Irrigation Guide
- (PDF) Small Wind Electric Systems: A Michigan Consumer’s Guide
- (PDF) Small Wind Electric Systems: An Idaho Consumer’s Guide (Revised)
- (PDF) The Incomplete Guide to off-grid Waste Management | Arthur Michelet – Academia.edu
- (PDF) HO-120: Off the Grid: Ultra-Low Pressure Drip Irrigation and Rainwater Catchment for Small Plots and High Tunnels