Are you tired of relying on expensive city water to irrigate your garden and plants?
Do you want to reduce your environmental footprint by harvesting rainwater from your roof?
Look no further than building a DIY rain barrel!
With just a few tools and materials, you can construct a functional and eco-friendly rain barrel that will collect and store rainwater for your outdoor watering needs.
We’ll walk you through the steps to build a sturdy and effective rain barrel that will help you save money on your water bill and do your part for the environment.
So grab your tools and let’s get started!
Choose the right materials
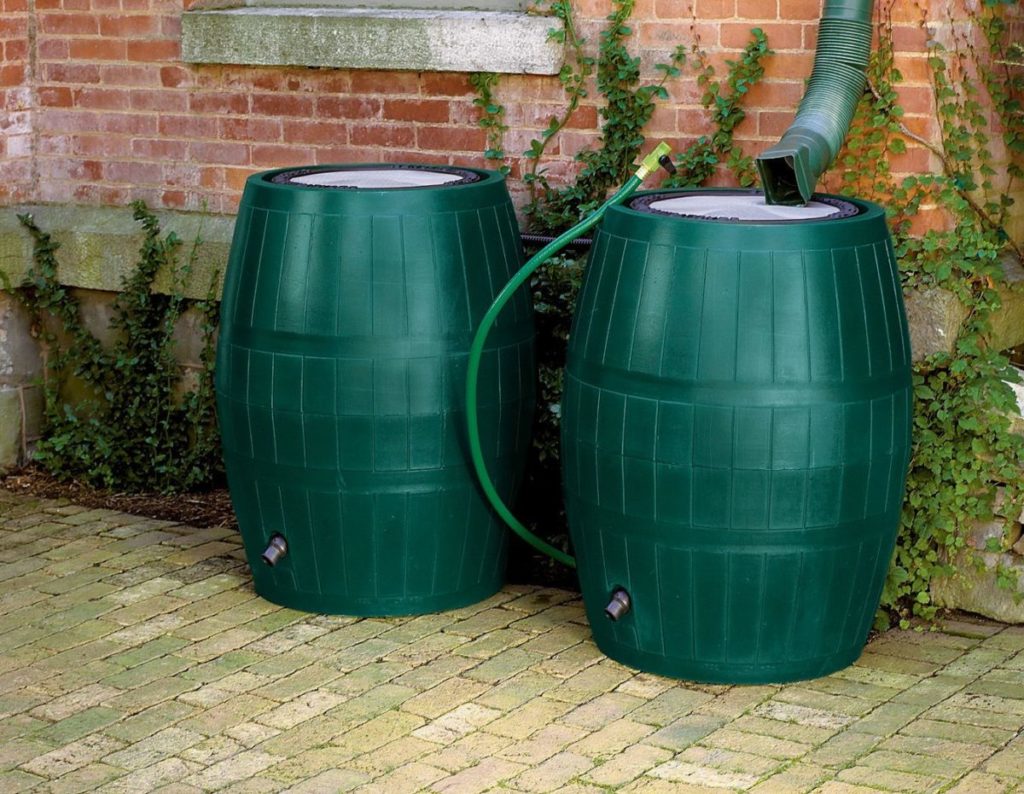
You will need a large, food-grade plastic barrel (55-gallon is a good size), a spigot, a overflow valve, and a downspout diverter. You can find these materials at a home improvement store or online.
First and foremost, you’ll need a large, food-grade plastic barrel – a 55-gallon size is a good choice – that is sturdy and watertight.
This will serve as the main storage container for your collected water.
Next, you’ll need a spigot, which is a fitting that protrudes from the side of the barrel and allows you to easily access the stored water.
Be sure to choose a spigot that is built to withstand the elements and is easy to operate.
Another important component is an overflow valve, which will automatically divert excess water if the barrel becomes too full.
This will help prevent any potential water damage or contamination.
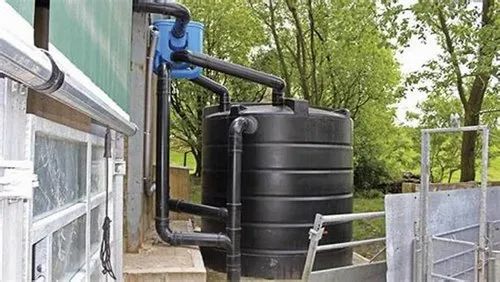
A downspout diverter is a must-have for directing roof runoff into your barrel.
This device fits onto your gutter downspout and channels water into the barrel, rather than allowing it to flow freely onto the ground.
With these essential components in place, you’ll be well on your way to harvesting and storing clean, reliable water for your homestead.
Clean and prepare the barrel
Before you start constructing your rain barrel, make sure the barrel is clean and free of any debris or residue. You can wash the barrel with soap and water, and let it dry completely before use.
Before you start constructing your rain barrel, it’s essential to ensure the barrel is clean and free of any debris or residue.
To do this, wash the barrel with soap and water.
Use a gentle cleaning solution to avoid damaging the barrel’s material.
Scrub the barrel thoroughly to remove any dirt, grime, or other substances that may be present.
Rinse the barrel with clean water to remove any soap residue.
Once the barrel is clean, allow it to dry completely before use.
This step is important to prevent any bacterial growth or contamination of the water collection system.
After the barrel is dry, you can move on to constructing the rest of your rainwater harvesting system with confidence.
Cut the downspout diverter
Measure and cut the downspout diverter to fit your downspout. The diverter should be installed about 2-3 feet above the ground to allow water to flow into the barrel.
To effectively measure and cut the downspout diverter for your gutter system, follow these steps
First, determine the length of your downspout by measuring from the gutter outlet to the point where you want to direct water into the barrel.
Account for any bends or turns in the downspout.
Next, purchase a downspout diverter that matches the length of your downspout measurement.
These devices typically come in standard sizes, such as 2 feet, 3 feet, and 4 feet.
Once you have the diverter, measure and cut it to fit your downspout.
Use a hacksaw or tile nippers to trim the diverter to the appropriate length.
It’s essential to leave enough room for water to flow freely into the barrel, so we recommend installing the diverter about 2-3 feet above the ground.
When installing the diverter, secure it tightly to the downspout with a sturdy clamp or screws.
Make sure the diverter is positioned so that water flows freely into the barrel, and check for any leaks or blockages.
By measuring and cutting the downspout diverter to fit your downspout and installing it appropriately, you’ll ensure a proper fit and efficient water collection for your rain barrel system.
Attach the overflow valve
Install the overflow valve on the side of the barrel, about 6-8 inches below the top. This valve will prevent the barrel from overflowing and causing water damage.
To effectively install the overflow valve on the side of the barrel and prevent it from overflowing, follow these steps
Locate the side of the barrel about 6-8 inches below the top.
This distance is important to ensure that the valve is positioned at the optimal height to prevent overflowing.
Attach the overflow valve to the barrel using the appropriate mounting hardware (e.g., bolts, screws, etc.).
Make sure the valve is securely fastened to prevent any movement or shifting during operation.
Connect the overflow valve to the proper piping or tubing to ensure proper water flow.
This may include attaching a downstream pipe or tubing to the valve outlet.
Once the valve is securely installed and connected, test it by filling the barrel with water to the appropriate level.
Activate the valve by opening the valve plug or using the appropriate control mechanism (e.g., a float, lever, or electric switch).
Observe the valve’s operation to ensure that it is functioning properly and preventing overflow.
To fine-tune the valve’s performance, adjust the valve plug or control mechanism as needed to regulate the water flow rate and pressure.
This may involve slightly adjusting the valve’s position or the length of the downstream piping to achieve the desired flow rate and pressure.
Remember to regularly inspect and maintain the valve to ensure optimal performance and longevity.
Install the spigot
Choose a location on the side of the barrel where you want to install the spigot. Make sure the spigot is securely attached to the barrel and that the threads are well-sealed to prevent leaks.
When installing a spigot on a barrel, it is important to select a location that allows for easy pouring and minimizes the risk of leaks.
Look for a spot on the side of the barrel that is free from any obstructions or burrs, as these can interfere with the spigot’s functionality.
Next, securely attach the spigot to the barrel using the appropriate fasteners, making sure that the threads are well-sealed to prevent any leaks.
This will ensure that the spigot remains securely in place and that your beverages remain fresh and uncontaminated.
Be sure to tighten the spigot firmly to prevent any drips or spills.
Assemble the barrel
Place the barrel on a level surface and attach the downspout diverter and overflow valve. Make sure all the parts are securely attached and that there are no leaks.
To properly install the Rain Barrel System, it is essential to place the barrel on a level surface.
This ensures that the water collected in the barrel is evenly distributed and does not accumulate in any one area.
Attach the downspout diverter and overflow valve to the barrel, making sure all parts are securely attached and there are no leaks.
The downspout diverter redirects rainwater from your roof’s gutter downspout into the barrel, while the overflow valve allows excess water to escape if the barrel becomes too full.
Properly attaching these parts will prevent any issues with water accumulation or spillage, ensuring that your rainwater collection system functions effectively and efficiently.
Make sure all connections are tightened securely to prevent any leaks, which could cause damage to your home or lawn.
Connect the spigot
Connect the spigot to the barrel and make sure it is securely attached. You can use a hose to attach the spigot to the barrel.
To ensure a secure and reliable connection between the spigot and the barrel, follow these steps
Connect the spigot to the barrel: Carefully align the spigot with the barrel and attach them together using the appropriate fittings, such as nuts and bolts.
Make sure the connection is secure and snug, without any loose parts.
Use a hose to attach the spigot to the barrel: If you’re using a hose to connect the spigot to the barrel, ensure that the hose is properly attached to both the spigot and the barrel, with no loose or damaged parts.
Use the correct fittings and clamps to secure the hose in place.
Test the connection: Before filling the barrel with water, test the connection between the spigot and the barrel to ensure there are no leaks or loose parts.
Turn on the water supply and check for any signs of dripping or escaping water.
If you find any issues, tighten any loose parts and re-test the connection.
Remember to regularly inspect and maintain your barrel and spigot system to ensure optimal performance and longevity.
Test the barrel
Once you have assembled the barrel, test it by running water through it. Make sure there are no leaks and that the barrel is functioning properly.
Make sure there are no leaks and that the barrel is functioning properly
Before you start using your new rain barrel, it’s essential to test it to ensure there are no leaks and that it’s functioning properly.
To do this, start by running water through the barrel by connecting a hose or downspout to the overflow valve.
Monitor the barrel as water flows through it, checking for any signs of leaks, such as water seeping from the sides or bottom of the barrel.
Also, make sure the overflow valve is working correctly by checking that water is overflowing as expected.
If you notice any leaks or issues with the overflow valve, make the necessary adjustments or repairs before using the barrel for collecting rainwater.
By thoroughly testing your rain barrel, you can ensure it’s ready for use and that you’ll be able to collect and store rainwater effectively.
Want More? Dive Deeper Here!
Hey there! If you’re the type who loves going down the rabbit hole of information (like we do), you’re in the right spot. We’ve pulled together some cool reads and resources that dive a bit deeper into the stuff we chat about on our site. Whether you’re just killing time or super into the topic, these picks might just be what you’re looking for. Happy reading!


